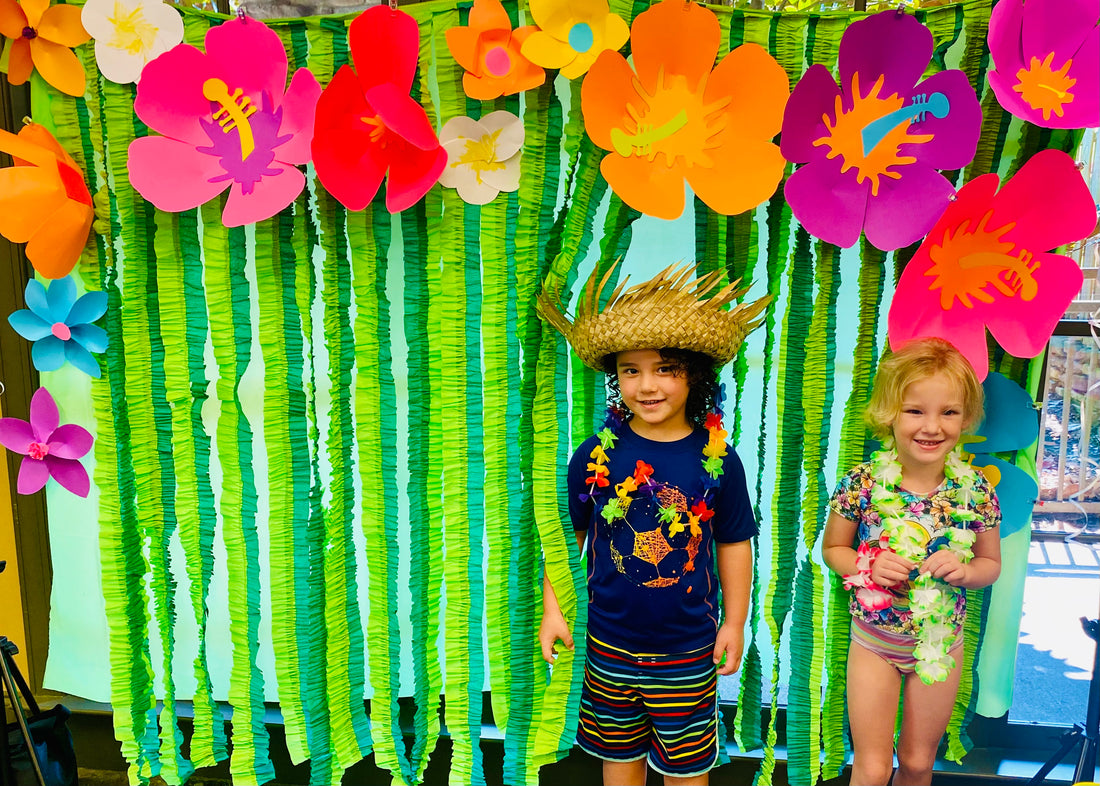
Ruffle Crepe paper streamers are one of my favorite easy DIY party decorations! They are quick and easy to make and very inexpensive. You can make them in any color or combination of colors. For my daughter’s recent Luau party, I used 2 shades of green to make them and used them for a photo booth backdrop and some extras to decorate my DIY Tiki piñata and DIY tiki buckets.
To make your own you will need:
2 rolls of crepe paper streamers in 1-2 colors (or you can overlap 3 rolls for an even wider streamer with up to 3 different colors)
pencil or wooden dowel
Sewing machine
Thread
Prepping Crepe Paper
Take 2 rolls of crepe paper streamers and hold them together by inserting a pencil or wooden dowel in the center. Sit the rolls down by your feet and with a few feet of streamers unrolled from the spools overlap both pieces slightly. I typically overlap the 2 pieces by 3/8 inches, but you can adjust how much you overlap as long as you stitch over both pieces at once. The less you overlap the wider your finished streamer will be, the more you overlap the easier it will be to catch both pieces with your stitching, but this will also make your finished streamer skinnier.
Sewing Crepe Paper
The trick to making these quickly is to get your sewing machine to do all the work for you! You want to use the longest straight stitch your machine can do and increase the tension to the highest possible number. With a long stitch and high tension, your machine will create beautiful ruffles on its own.
Just overlap your 2 pieces slightly and stitch on the overlapping section. Just keep feeding the streamers through your machine (making sure they are still overlapped) while unrolling more length from the floor.

Seriously that’s it, you can press your pedal to the floor and watch as mounds of ruffles pile up behind your machine! For anyone that sews ruffles for clothing, you will appreciate how quick and easy this is! I wish making ruffles from fabric was this fast and simple!
How much to Sew
You can either measure the finished ruffles pieces to the length you need and backstitch on each end to keep it from unraveling later or go ahead and stitch the full rolls and when you cut the pieces to size, add an extra inch to each end, fold it over and tape the strings down to the backside.
For my daughter’s Luau birthday party, I used a bunch of strips glued at the top to a plastic tablecloth to create this fun photo booth backdrop.
I just clipped the backdrop to my Adjustable Backdrop Stand. I love this stand for times I can’t attach stuff to the wall, either because I’m in a rented space or I’m setting up away from a wall. It’s quick to assemble and includes large clips for attaching backdrops. This stand also included sandbags that make this stand sturdy for use around kids.
I completed the backdrop using the Free Paper Flower Templates from Gina Creates! I had planned to attach the paper flowers with glue dots, but the flowers were heavier than I realized and I had to compromise and use some small pins to help hold them. I was already at my event space before I realized my glue dot plan wasn't going to work. If I made this again, I would bring a glue gun or stapler to the event space for attaching the flowers.

Other Uses Besides Backdrop
I also used a couple of extra pieces when making my own tiki piñata and tiki buckets. I just cut the strips to the size I needed and added a few foam flower stickers to the ruffles. 

You can use these ruffled streamers just like you would use any other crepe paper streamers on the ceiling or table fronts and they will be sure to wow your guests!
**I have included affiliate links to the products I used and can receive a small commission if a purchase is made after you click on a link in this tutorial.
MagpieTayleetot is a participant in the
Amazon Services LLC Associates
Program, an affiliate advertising
program designed to provide a means
for sites to earn advertising fees by
advertising and linking to Amazon.com.


