Step into the enchanting world of Glow-in-the-Dark Birthday Parties for kids, where I've composed a comprehensive guide on glow party decorations you can make, how to make your food glow, what to wear to a glow party, glow party invites, and more! In this blog post, I will guide you through the journey of planning a unique and memorable celebration. From crafting your own decorations to whipping up delicious treats, join me in illuminating your child's special day with these DIY wonders for any neon glow party.
It wasn't until I started blogging details of crafts I had made for some of my daughter's recent Birthday parties that I realized how many "ocean" themed pool parties we had thrown! For her 5th birthday, she selected a mermaid theme, for her 6th birthday we threw a Luau party, and for her 7th she requested an Under the Sea Party! I guess having the pool involved made us keep gravitating to water-related themes!
We stuck with a party at our neighborhood pool this year (it keeps the kids from tearing up my house, provides easy entertainment, but is close to home and allows me to make multiple trips with decorations and party supplies during setup), but decided to go a totally different direction with the theme! My daughter knew she was having a birthday party, but she thought it was going to be on Saturday. I secretly set up for the party while she was at school on Friday, and surprised her Friday night with a super fun GLOW party!
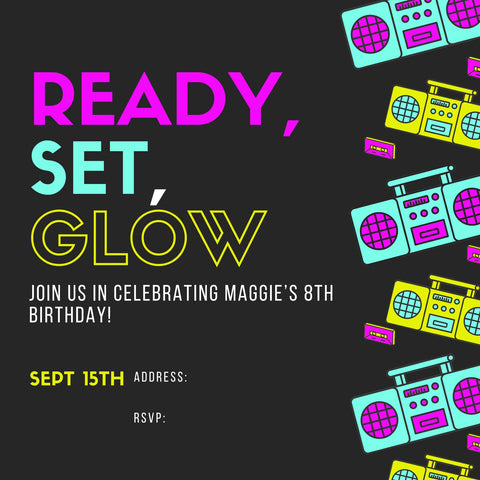
Glow Party Invites
It is super easy and free to make your own glow party invites using Canva! I have linked the invitation I selected for my daughter's party, but there are lots of other free templates you can choose from, or create something from scratch with Canva's design tools!
Decorations
BLACKLIGHTS
The single most important thing for a GLOW party is some blacklights! Without them, you will be hard-pressed to get anything to glow! While I love making everything for parties, this was a supply I just had to purchase and it would help illuminate everything else I made. The number of lights you will need depends on the size of your space, but for our neighborhood party room, I decided on a set of 2 100W LED Floodlights and a Pair of 10W LED Blacklight Bars. The 100W lights get hot and need to be kept away from anything plastic and from kids' hands, but the 10W bar could be placed directly on things I wanted to highlight (like the cake). Of course, if you are throwing the party in your own home, you could just replace your lightbulbs with Blacklight bulbs!
BLACKING OUT THE WINDOWS
I thought the GLOW theme would be perfect for a Friday evening party, but what I didn't think of when initially planning was that it doesn't get dark until almost 9 PM here in Alabama during the summer. 9 PM would be a little late for a start time for elementary-aged kids, especially on a day when they had been at school! I realized I would need to black out the sunlight coming in the windows so the black light could work and everything would glow!
The more UV-reactive decorations in the room, the more the whole room lights up and glows, so I decided to kill 2 birds with 1 stone and decorate a window covering that would both black out the light and have flecks of neon color.
To make these window coverings, I needed:
Black Table Cloth Roll 100 feet
Paint Brush
Glue Dots (for hanging)
I simply unrolled a section of tablecloth at a time and used a paintbrush to fling the neon paint all over the tablecloth. I tried stretching this out in my driveway, but even the slightest amount of wind caused the tablecloths to flip, so I did this over the course of several days inside my house with drop clothes covering my hardwood floors in case of splatter. After a section was dry, I rolled it up and unrolled some more plain black material, and repeated until the entire 100-foot roll had been painted.
I had enough painted tablecloths to cover the glass door, and 6 large windows, and also used them on the dessert table, gift table, and glow bar table.
On the day of the party, I just used some Glue Dots to hold these on the windows. They held strong from the time I set up around noon, until after the party around 10 PM, even on the door the kids frequently opened and closed. They peeled off the glass without any residue or needing special cleaners. I completely forgot to get a picture of the covered windows on their own, but you can see a small piece of the covered window behind my photo booth here:
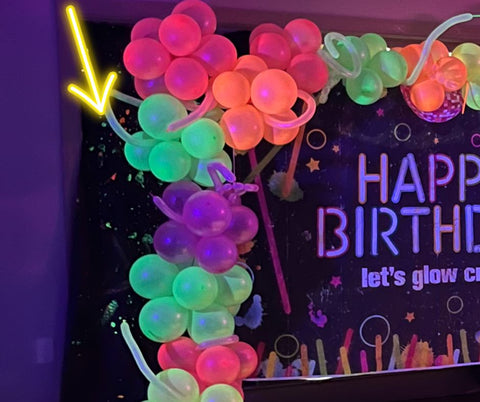
The little pop of color and glow really helped the whole room pop!
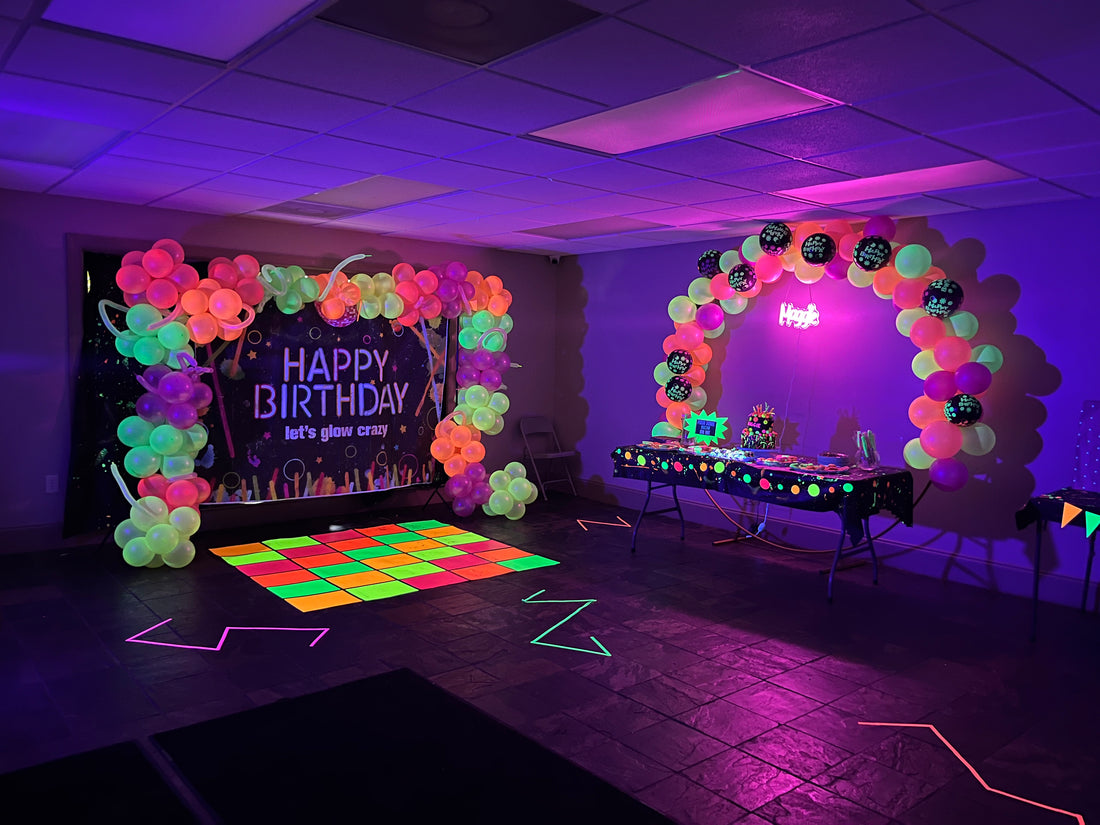
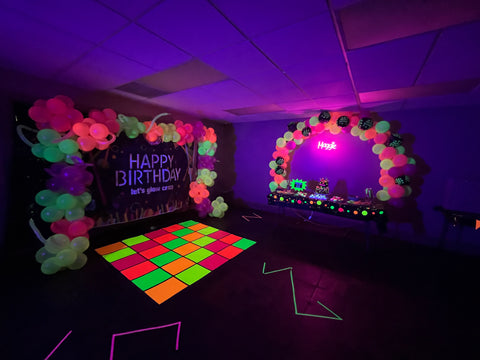
PHOTOBOOTH
If you have read about any of my parties in the past, you know I must have a Photobooth! I love photo booths because the large backdrop really helps decorate a room, but it also provides a perfect spot to take a picture of all the guests!
I ordered this Happy Birthday- Let's Glow Crazy banner on Temu and hung it with my Backdrop Stand before adding a large balloon garland.
I ordered multiple sets of glow balloons and quickly realized that all the glow balloons out there were very transparent. I'm not a fan of transparent balloons, I think they look cheap, so to achieve this look, I double-stuffed all the balloons.
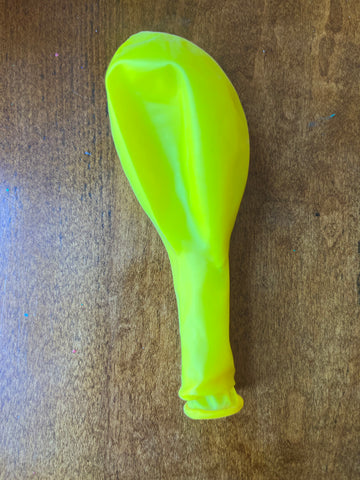
If you haven't double stuffed balloons before, here is how you do it:
Take a small paint brush and insert the smooth end (non brush end) into 1 balloon. 
Then slide a second balloon over the same smooth end of the brush with the other balloon still on the brush.
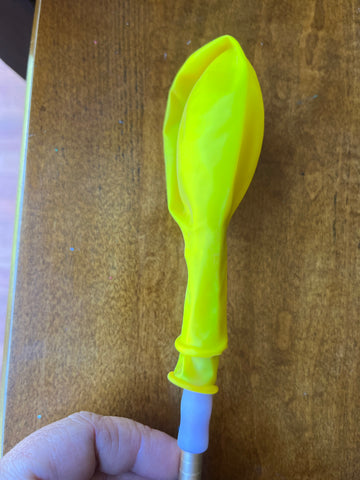
With both balloons on the brush, pinch the balloons at the top and slide the brush out, now inflate both balloons together at the same time. The balloons will stay together, and you can double-stuff the balloons early and store them in a box or bag until you are ready to inflate on a different day!
To make the balloon garland that is around the photo booth, I used 2 160 piece glow balloons sets that I double stuffed. I ordered 320 balloons, and double-stuffed them, leaving me 160 balloons to inflate. I used my electric balloon pump to inflate 2 sets of double-stuffed balloons at a time. I then tied those 2 double stuffed balloons together (this saves so much time and doesn't hurt your fingers as much as tying individual balloons).
I repeated this process until I had 4 sets of balloons (8 double stuffed balloons, 16 individual balloons if you count the double stuffed ones inside). I twisted the balloons together to make a cluster of 8 matching balloons.
I inflated my balloons several days in advance and stored them in balloon bags until the day of the party. Once I was onsite, I used 260 balloons to tie the clusters together and attach them to the backdrop stand. I inflated and curled a few extra 260 balloons to give a little more dimension to the balloon garland. 260 balloons are easy to curl and shape. To create a curly balloon, inflate the 260 balloon, tie the balloon closed, and then wrap it around something (I usually use my own arm for loose curls). With the balloon wrapped around something, gently squeeze the sides of the balloon, when you unwrap it, it will keep the curl!
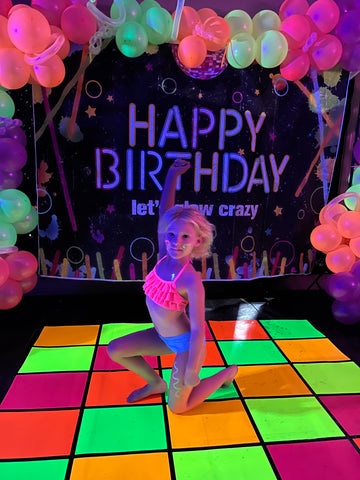
After hanging the backdrop and balloon garland for the photo booth, I added the Neon Dance Floor I had already made. You can check out how I made the Dance Floor on a budget HERE!
DESSERT TABLE DECORATIONS
I placed my 7 foot circular balloon arch frame behind the dessert table. I had ordered a Custom Neon Sign with my daughter's name from Amazon (be sure to clip the coupon if you order one!) I hung the neon sign on the circular balloon arch frame during the party, and now it is hanging in her bedroom at home! I made some additional clusters of 6 balloons (5 double stuffed glow balloons and 1 Happy Birthday Glow Balloon per cluster) and twisted them onto the round balloon arch frame. I only added balloons to the top half of the circle that would be visible above the table.
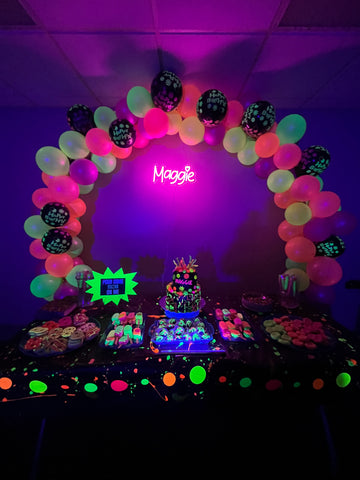
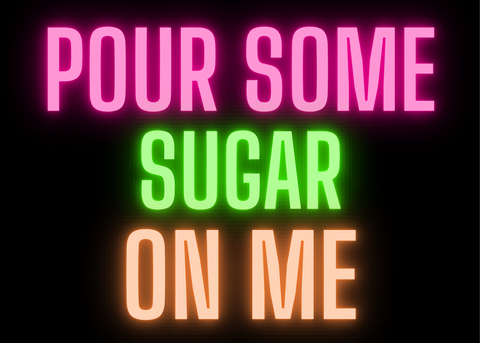
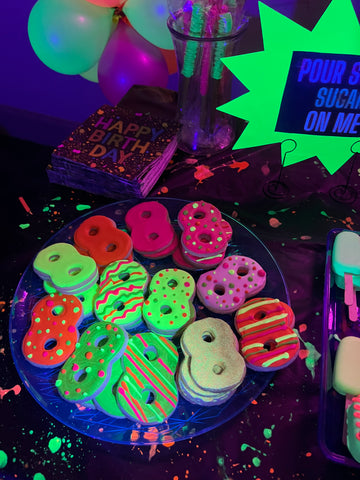
I used a piece of the paint-splattered tablecloth I made for the windows on the dessert table. I printed a glowing sign that said "Pour Some Sugar on Me", matted it with some of the poster board I had left over from making the dance floor, and placed it on the dessert table. If you would like to download and print this sign you can do so for free HERE. The sign will print as a 5x7, so you can frame or mat it.
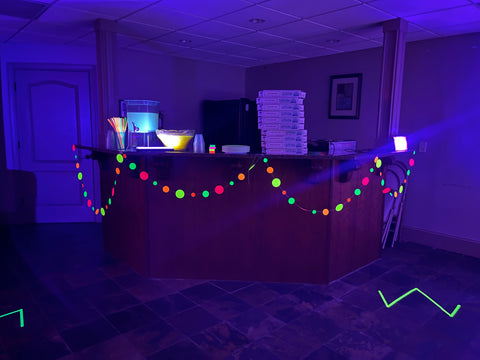
I added some neon dot garland to the front of the dessert table. You can purchase these pre-made, but if you have a sewing machine, it's easy to make your own! I had leftover poster board after making the dance floor, and made my own using it!
I cut circles in various sizes and colors with a Circle Punch Set (you could also use a Cricut to cut circles). Once I had a large stack of circles, I started stitching them together using white thread and a long straight stitch on my sewing machine.
After sewing through each circle, I would just pull the thread out a couple of inches and start sewing the next circle. I just sewed all the pieces in a single straight line and then cut each garland to size while decorating for the party.
I love sewing fabric to make clothes, but it's one of my favorite party hacks to sew paper decorations for parties. If you are looking for other fun things you can sew for parties, be sure to check out my Ruffled Crepe Paper Streamers Tutorial! I had actually bought some neon crepe paper streamers I planned to use for the party, but when I tested them they weren't UV-reactive.
NEON GAFFER TAPE FLOOR
I used some Neon Gaffer Tape to make designs on the floor. This is a fabric tape that peels right up without leaving a residue. If the party had been at my house, I would have added some to the walls as well since it could be removed without damage.
Adding some extra pops of color to the floors or walls really helps brighten the whole room, and the gaffer tape was quick and easy to use!
GLOW BAR - Decorations, Activity, and Party Favors
I set up a glow bar full of fun things that glow for the kids to use during the party and take home afterward!
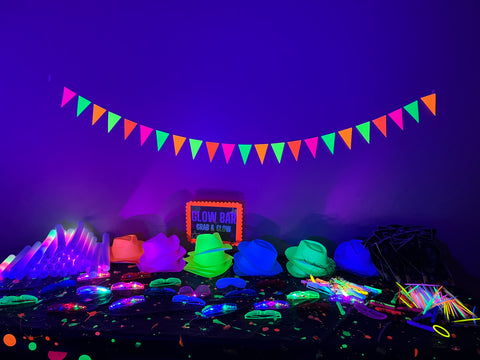
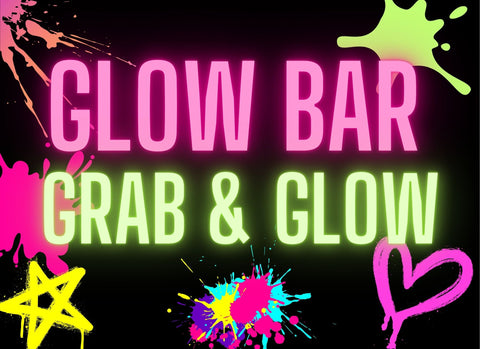
I made this sign that said Glow Bar Grab and Glow, printed it, and matted it with some leftover neon paper. If you would like to download and print a free copy of this sign, you can find it HERE.
I covered the table with some more of the paint splatter tablecloths and added some more circle garland to the front of the table. I used the same sewing technique to make a triangle banner garland that I hung behind the glow bar
I ordered some Foam Glow Sticks that were a big hit with the kids and looked really cool being waved around in pictures!
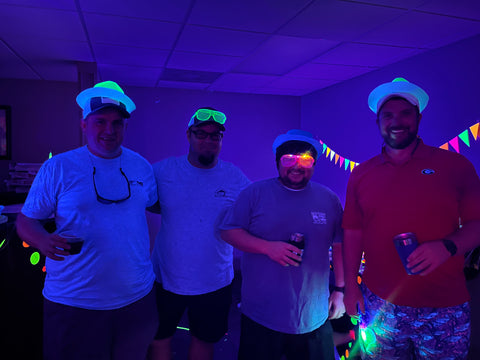
These Neon Fedora Hats and Light up Sunglasses made fun party hats and favors and were enjoyed by the kids and some of the Dads too!
I also included some traditional Glow Stick Necklaces and Bracelets . On the Glow Bar, I had already cracked them just before the party so they would be glowing and ready to go! I included some extras that hadn't been lit up yet in the goodie bags.
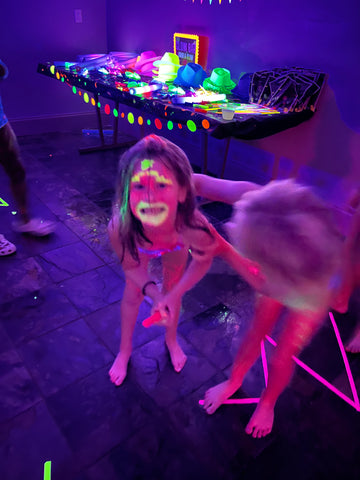
By far, the biggest hit of the Glow Bar was the Blacklight Body Paint Markers and the Blacklight Hair Chalk Wands, the kids went crazy over these and loved applying them to themselves and their friends/parents!
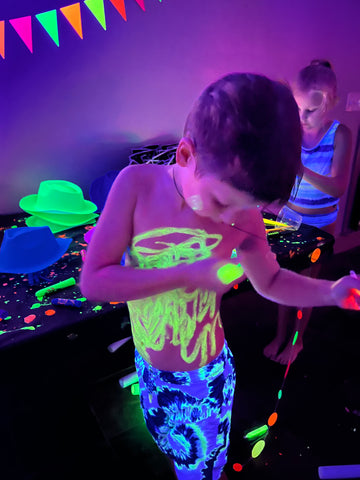
Some of them carefully drew designs on themselves, and others just covered as much of their hair and skin as possible! Thankfully these were nontoxic and washed off really easily. I had gotten some on my shirt, and it didn't stain!
Lastly, I filled some Glow Goodie Bags (these didn't actually glow in blacklight, I was bummed and hadn't thought to check them before the party) with extra glow necklaces, glowing candy (Neon Candy Straws, Laffy Taffy, Pop Rocks, and Lollipops), and some Glow in the Dark Temporary Tattoos! I left the goodie bags on the end of the Glow Bar, and encouraged the kids to grab extra stuff from the Glow Bar at the end of the night.
Glow Party Food - Glow in the Dark Food Ideas
The secret to making all the goodies glow is this amazing Neon Glow Food Dye! I used it to color Candy Melts, Royal Icing, Fondant and Sanding Sugar! It comes in powder form, so it can be used for recipes that normally require oil-based, water-based, or gel food coloring! A little goes a long way and this dye glows amazingly under blacklight!
Glowing Pretzel Rods
The absolute easiest treat I made was some pretzel rods dipped in neon glowing chocolate! To make these, melt some white candy melts or white chocolate according to the package directions (I always melt for 60 seconds on 50% power, stir and continue to microwave for 30 seconds at a time on 50% power until the mixture is melted and smooth).
After the candy melts are melted, just add 1/4 of a teaspoon of the Neon Glow Food Dye and stir until fully combined. You can't add traditional food dye to candy melts or chocolate because the water will cause the candy to seize, thankfully this powdered dye mixes in beautifully and easily!
Once the candy is dyed, just dip a pretzel rod in, shake off the excess, and place it on some parchment paper or a silicone baking mat to cool and harden. You can leave the pretzel rods as is, or I like to add an additional drizzle of the melted candy over the dipped rod. I cut the tip off a disposable piping bag and drizzle the candy back and forth over the pretzel rod.
I put the pretzel rods in tall treat bags so extras can be sent home with guests at the end of the party!

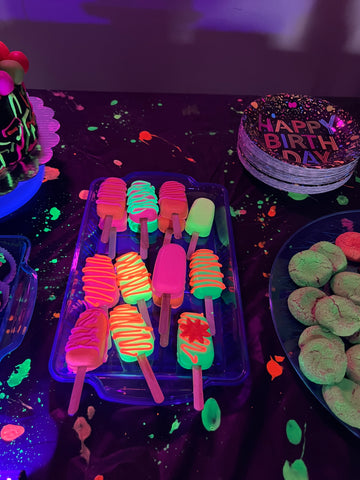
Glow Cakesicles
Cakesicles are always a huge hit with kids! They look like a popsicle and taste like a cake pop! I used the same technique from above to dye the white candy melts and used it to make these amazing glowing cakesicles! I shared my recipe and provided a full tutorial for how I made them on my Neon Glow in the Dark Cakesicle Tutorial!
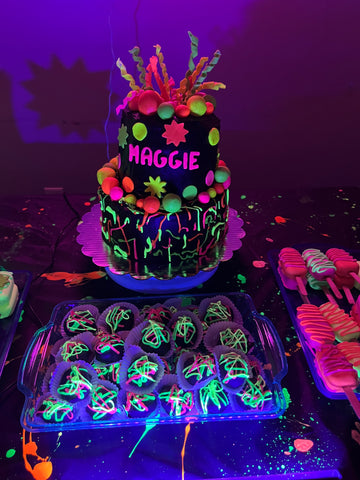
Oreo Truffles
The final treat I made using the same dyed candy melts was Oreo Truffles! They are one of my daughter's favorite treats, so I knew I needed to include them and thought they would look great with splashes of glowing neon color.
I used this Oreo Truffle Recipe from Two Peas and Their Pod and substituted black candy melts for the chocolate wafers. Black candy melts are pretty dark grey in my opinion, and I wanted the base of these truffles to be jet black. To achieve a dark black color, I mixed in a couple of tablespoons of black cocoa powder after the candy melts had been melted. I used this same cocoa powder to dye the icing for the cake black.
If you use enough black food dye in icing to achieve a black color, it will dye everyone's mouth and teeth black. Instead of food dye, I used black cocoa powder to get a dark black shade. Since the powdered neon food dye mixed in easily to the candy melts, I figured the cocoa powder would too. I was right! It gave an excellent shade of black and even improved the flavor! I think black cocoa powder tastes like Oreos, so this was perfect!
I used the extra candy melts that were colored with Neon Glow Food Dye that I used for the pretzels and cakesicles to drizzle on top of the Oreo Truffles!
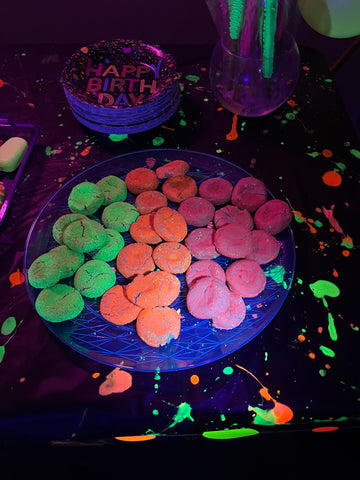
Neon Glow Peanut Butter Blossom Cookies
When researching foods that glow in black light, I read about how peanut butter glows. I thought peanut butter blossom cookies with colored sanding sugar would be fun! White chocolate glows, so I had planned to get white Hershey's Kisses for these but was unable to find any locally at the last minute. I used a Peanut Butter Blossom Recipe from If You Give a Blonde a Kitchen to make these cookies.
I made my own sanding sugar that would glow in blacklight by using this DIY Sanding Sugar Technique from Scrambled Chefs. I started with regular neon-colored gel food coloring, which didn't glow under black light. I then added a small pinch of the Neon Glow Food Dye to the sugar and it glowed beautifully! I liked the combination of gel food coloring and the glow powder. The neon gel food coloring made it look neon in regular lighting and the glow powder helped it shine under blacklight! It was the best of both worlds!
Royal Icing Cookies
I love Royal Icing Cookies for Birthday parties! I think they beautifully complement a cake! I am not the best at piping detailed decorations, but can handle basic shapes and designs. I couldn't think of a basic shape that fit the glow theme, but since my daughter was turning eight years old, I decided to make cookies that glowed in the shape of a number 8!
I used Sally's Baking Addiction's Sugar Cookie Recipe with Number 8 Cookie Cutters to make the cookies.
After the cookies cooled, I used Preppy Kitchen's Royal Icing Recipe. When it came time to dye the icing, I used a drop of neon gel coloring and 1/4th of a teaspoon of Neon Glow Food Dye, if you only care how they look under blacklight, you can skip the gel food coloring entirely (in fact they glow a little brighter without the gel coloring added).
I had some leftover sanding sugar from making the peanut butter cookies. I painted a white cookie with a little bit of water and added some sanding sugar to some of the cookies. They glowed, but not as vibrant as the royal icing, so I didn't decorate many with this technique.
I saved the leftover Royal Icing and used it on the cake later! Just make sure the royal icing is in and air-tight container if you aren't using it all right away!
Glow Cake
If you've been here before, you have probably heard me say, I'm a great baker but not the best cake decorator! My cakes are delicious, but I've never been particularly skilled with a piping bag (it’s probably because I'm equally horrible at drawing!) I love to make my daughters’ cakes though, so I’m always looking for ideas that don’t require a lot of decorating skills!
I made some fondant decorations a couple of days before the party so they would have time to dry out. I made a double batch of Marshmallow Fondant with a recipe from The Spruce Eats. I waited until the final step to add coloring and added a couple of drops of neon gel food coloring along with 1/2 a tsp of Neon Glow Food Dye.
Once the fondant was colored, I used some small letter and shape cutters to cut out my daughter's name along with polka dots and stars. Next, I cut thin strips of fondant, wrapped them around a Lollipop Stick, and then slid the stick out, leaving a curly ribbon of fondant behind. Finally, I rolled the leftover fondant into balls of various sizes with my hands, placed a toothpick inside, and then stuck the other end of the toothpick into some Styrofoam until the balls had dried out and hardened.
I also needed to prep the black icing several days in advance. I didn't want to dye the teeth and mouths of everyone black by using black food dye to color the frosting. Instead, I used Mom Loves Baking's recipe for Black Buttercream made with Black Cocoa Powder. This recipe is delicious as requires no food dye to create a perfect jet-black color. After I mixed up the buttercream, it was more of a dark grey, but just as she described, it developed a deep black color in the fridge after a couple of days!
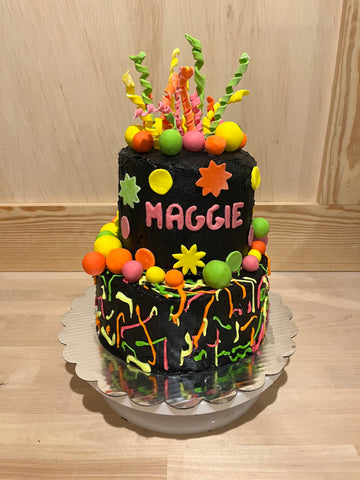
After I coated both tiers (a 4-layer, 6-inch cake on top, and a 3-layer, 9-inch cake on the bottom) of the cake in black buttercream, I used leftover Royal icing from the cookies to make splatters on the bottom tier of the cake. I arranged all the fondant decorations I had made on the top layer. I stacked the 6-inch cake on top and then added some additional fondant balls to the edges of the bottom tier.
Here was the cake in normal lighting.
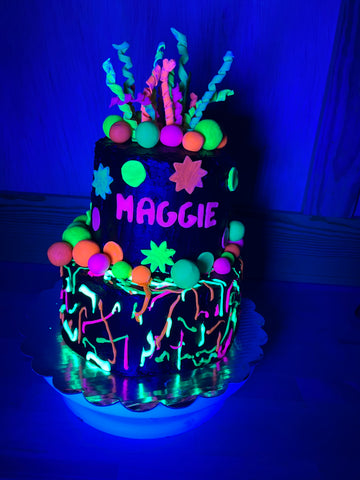
Here is the cake in the dark with black lights.
Drinks that Glow in the Dark under Blacklight
I discovered 2 ingredients that glow different colors under blacklight that would work for drinks! The first was tonic water, which glows blue. The second was vitamin B2, which glows yellow.
I made 2 different drinks. The first was Electric Lemonade. I mixed enough lemonade powder to make 2 gallons of lemonade with Sprite replacing half the water and tonic water replacing the other half of the water. This drink glowed blue! The tonic water will glow as long as it makes up 50% of the liquid in a drink!
For the second drink, in a large punch bowl, I added 6 Vitamin b2 Tablets that I had ground up along with a 2-liter of Fresca, 2 cups of tonic water, and 2 cups of orange juice.
I served the drinks in clear cups so you could see them glow, and added some neon straws!
This Glow Party was so much fun! The kids had a blast playing in the blacklight and eating and drinking so many things that glowed! I can't wait to throw another blacklight party! I think lots of the glowing food and drinks would be perfect for Halloween, and can't wait to make some more soon!
**I have included affiliate links to the products I used and can receive a small commission if a purchase is made after you click on a link in this tutorial. All items used in this tutorial were purchased by me and I did not receive anything in exchange.
MagpieTayleetot is a participant in the
Amazon Services LLC Associates
Program, an affiliate advertising
program designed to provide a means
for sites to earn advertising fees by
advertising and linking to Amazon.com

2 comments
This is by far the MOST helpful post I’ve seen for a glow party!! THANK YOU FOR BEING AWESOME AND SHARING YOUR MAD PARTY SKILLS!! So many awesome ideas! And the description are perfectly specific and useful. The link to your dance floor isn’t working, I’d love to check that out to.
Thanks for all the ideas you’ve provided us im most definitely gods try some of them for my daughter glow party on the 17 of august her birthday is the 12 can’t wait to make things glow